How to install Memory Module 168 pin dimm?
Installation Instructions For 168 pin DIMM
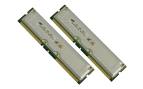
These instructions provide general installation and handling information for 168-pin Dimms. These instructions are intended to be used in conjunction with your model-specific owner's manual.
Note: The memory module contain electronic components that are sensitive to electrostatic discharge (ESD). Improper handling could damage your computer. Leave the module in its protective anti-static bag until ready to install, and handle it only as instructed by your Computer Manufacturer. If you have reservations about installing the module, ask for assistance from a qualified technician.
INSTALLATION PROCEDURE
1. Place the computer's power switch in the "off " position and disconnect the AC power cord.
2. Remove the computer's top cover following the instructions in the model-specific owner's manual.
3. Before touching any electronic components, make sure you first touch an unpainted, grounded metal object to discharge any static electricity stored on your clothing or body.
4. Locate the memory expansion sockets on the computer's motherboard. If all the sockets are full, remove smaller capacity modules to allow room for higher capacity modules.
5. Handle your new module's carefully; do not flex or bend the module(s). Always grasp the module by its edges.
6. For some installations, DIMM memory can be installed in any available expansion slot. Other installations may require the memory to be installed in a particular sequence based on the modules capacity. Check your owner's manual to determine the correct installation sequence for your configuration.
7. Once the modules have been installed, the computer's top cover can be reinstalled.
8. Plug in the AC power cord and reinstall any cables disconnected during the installation process.
9. Turn on the computer and follow the instructions in your computer owner's manual that describe the steps necessary to allow your computer to recognize the newly installed memory.
Memory Upgrades by RAM Types


 100% Secure 256Bit Encryption
Payment methods

Get social with us


Copyright © 1999, MemoryStock. All Rights Reserved